Nomistic's historical wargaming
Editor's note: this guide was written before "attributes" were available. We'd recommend switching to attributes instead of the colon-suffixed tag approach, but wanted to preserve Nomistic's original guide in it's full glory!
After working with Envoy/Orynt3D for a few months, I've finally put order where chaos was. In the process, I had to come up with a tagging convention that suited my needs. It was an iterative process and I thought you might appreciate the final result (for now) and see the workflow I've developed in the process.
DISCLAIMER: this is what works for me. I share it to inspire you to build your own structure. Each of our collection and our goals are different.
Folder structure
First thing is my folder structure.
All my models are in a single source (in Orynt3D parlance). In that folder, I have only folders, one for each creator I've collected models from. I treat as creator large studios like Loot, Arch Villain, RN Estudios, but also Thingiverse creators that published only a single model (so far). That means a lot of folders.
Within a creator's folder, I will create a subfolder for each model I want to see in Orynt3D. I will also drag from my browser the url of the creator's home page(s) from Thingiverse, Wargaming3D, Cults, Printables, MyMiniFactory, etc. If I liked a model enough to download it, there might be more from that creator that I will want to grab in the future.
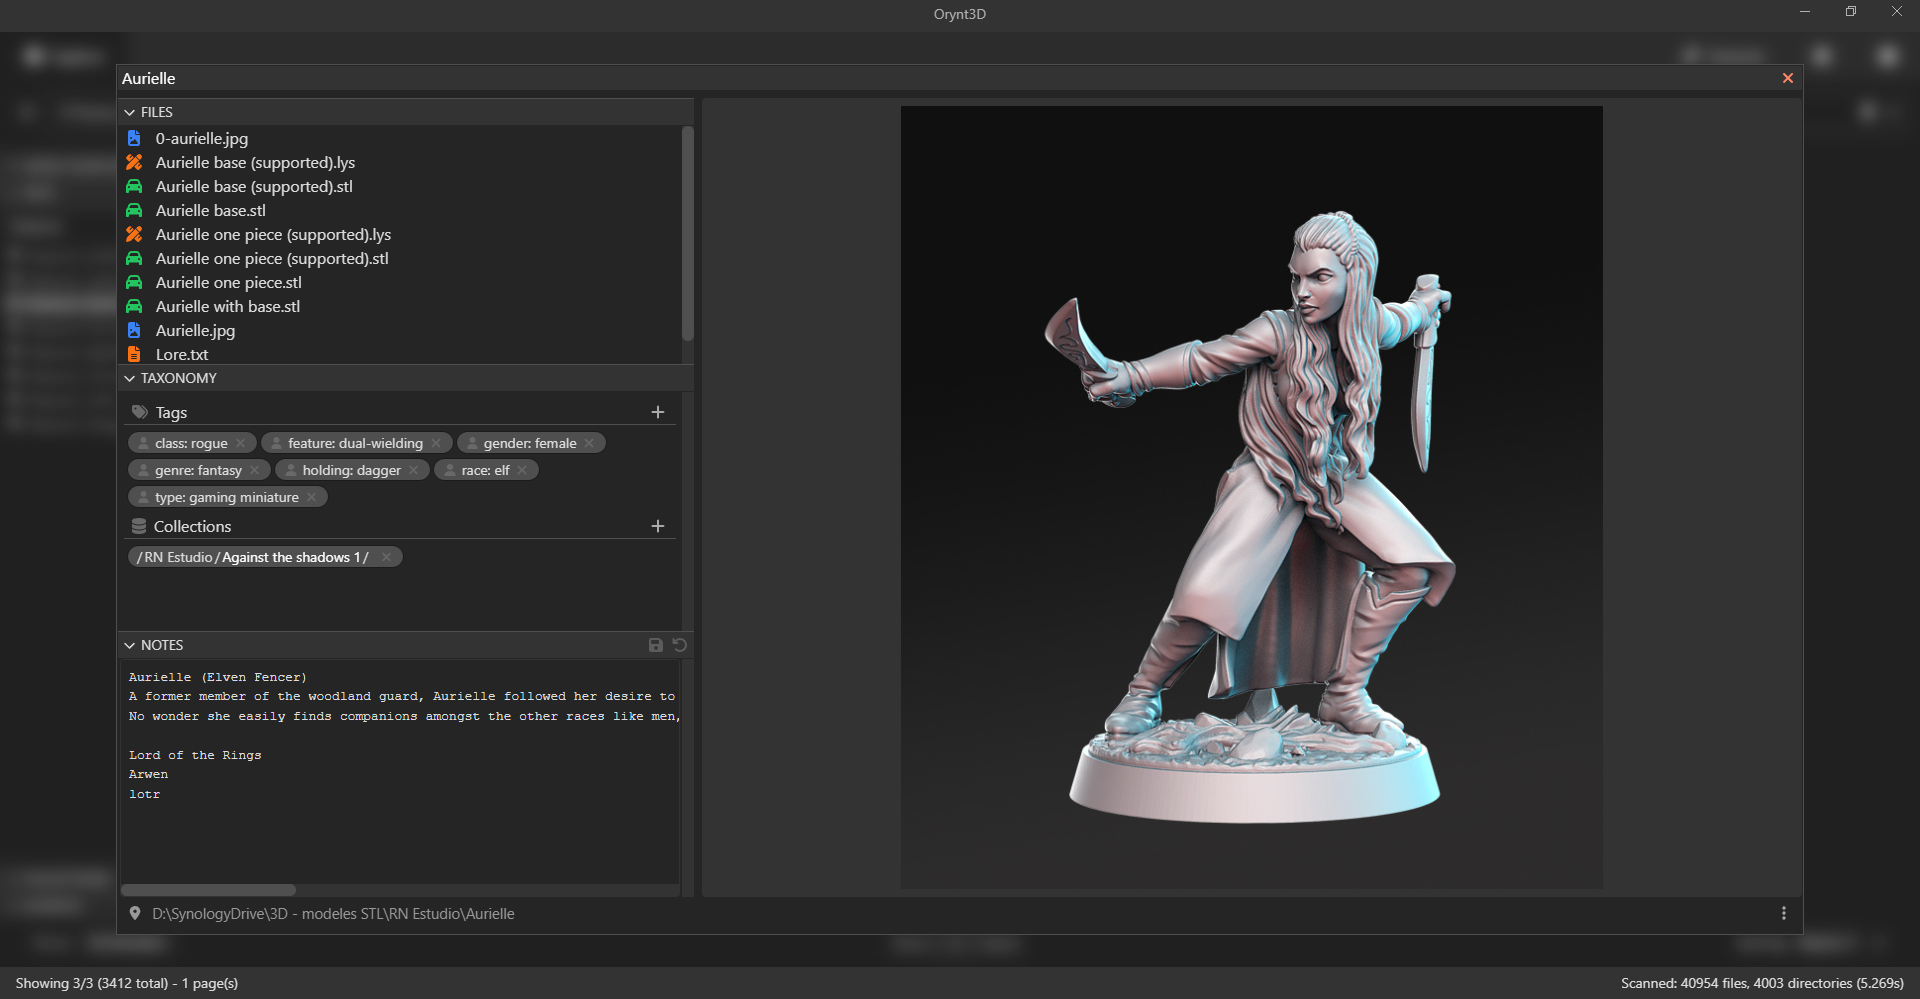
For the model folders, I will flatten the structure, meaning if there is subfolders for supported versions, different sizes, images, etc, I all bring them into a single folder, making sure the name of the files will let me distinguish between the various versions. At this stage, if the source of the model had pictures, I will select the image that should be used as thumbnail by pre-pending 0- in front of its name, to make sure it's the one picked up by Orynt3D. If there's no preview, I'll save a screenshot using Papa's Best STL viewer.

Folder and file layout
Once the files are organized in the filesystem, it's time to switch to Orynt3D and tagging all the models.
Tagging system
Inspired by ThatRobHuman, I've created a system of keyword:attributes as tags. I've decided that every model would be tagged with a type:. Then most of the model types will be assigned a genre: and a faction:. And finaly all models tagged gaming miniatures: would be further described with tags for race:, gender:, class:, etc. So far, here are the keywords that I use:
type:genre:faction:race:gender:class:holding:wearing:feature:
Feature: is bit of a catch all where I want to capture stuff like if the model has wings, antlers is dual-wielding or is nswf.

Tags on a model
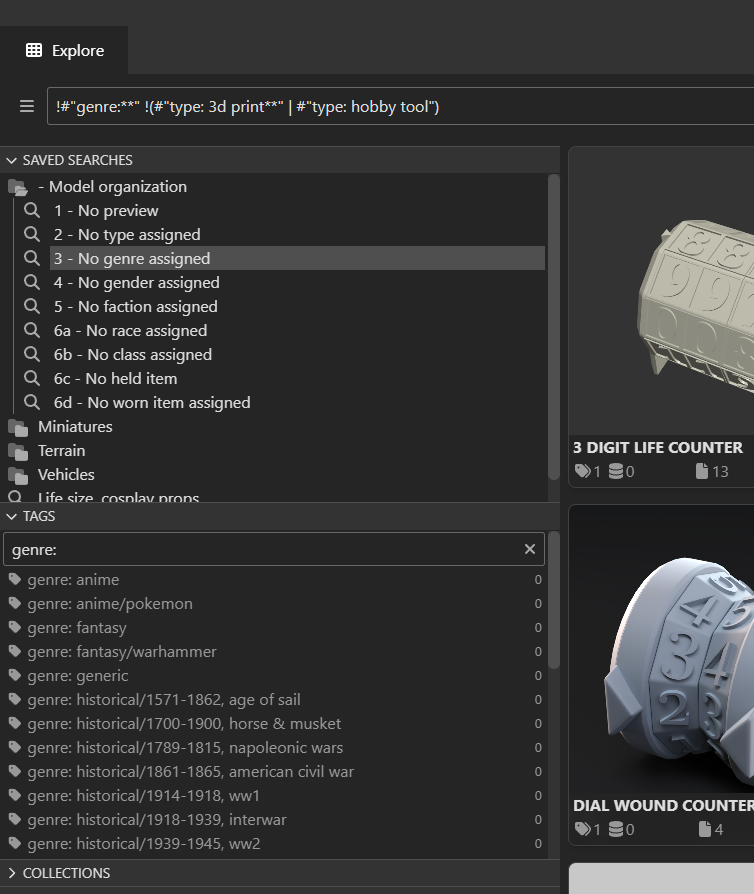
To help in tagging, I've come up with a series of saved searches for models not already tagged. For example, when adding a genre, I filter with this query !#"genre:**" !(#"type: 3d print**" | #"type: hobby tool"). Then in the tag browser, I will filter on the genre: tags and then it's just a matter of drag'n dropping the models on the applicable genre: tag. I've numbered these searches in an order that funnels down from the most generic to the more specific tags and collected them under - Model organization.

Full set of tags and search query
And that's it. Hope you found this helpful.
Using saved searches to find unprocessed models
In processing my models, I put the folders/files into shape, then run the following saved searches one after the other.
- No preview
! f:"*.jpg" & ! f:"*.png" & ! f:"*.gif" & ! f:"*.jpeg" & ! f:"*.jfif" & ! f:"*.webp" - No type assigned
! attr:"type"="**" - No genre assigned
!attr:"genre"="**" !(attr:"type"="3d print**" | attr:"type"="hobby tool" | attr:"type"="replacement part" | attr:"type"="game accessory" | attr:"type"="utility") - No gender assigned
!attr:"gender"="**" attr:"type"="gaming miniature" - No faction assigned
(attr:"type"="gaming miniature" | attr:"type"="vehicle**") !attr:"faction"="** - No race assigned
!attr:"race"="**" attr:"type"="gaming miniature" - No class assigned
!attr:"class"="**" attr:"type"="gaming miniature" - No held item
!attr:"holding"="**" attr:"type"="gaming miniature" - No worn item assigned
!attr:"wearing"="**" attr:"type"="gaming miniature"
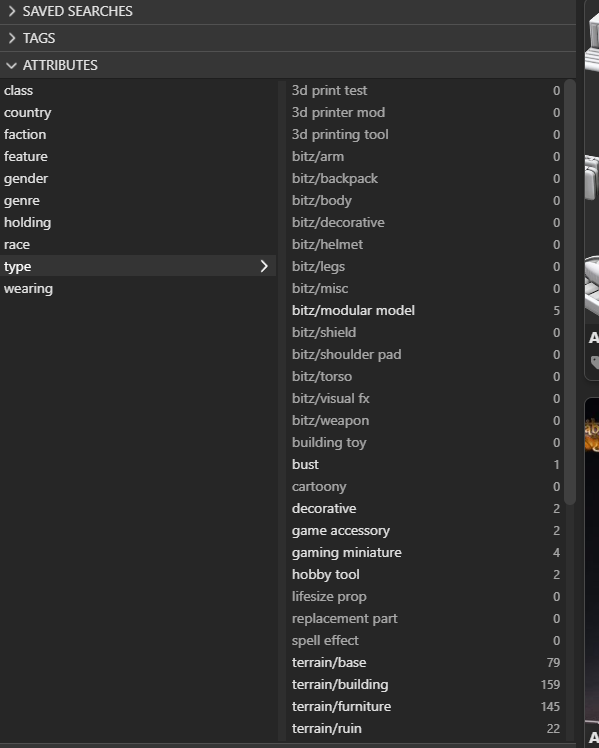
So for example, when selecting search 2 - No type assigned, I open on the sidebar the type attribute and then multi-select the models in the search result and drag them on the desired type. Rinse and repeat with every attribute. Attributes do all the heavy lifting.

Full set of tags and attributes
